2022.08.06 - [임베디드 하드웨어/Raspberry PI Pico] - rpi-pico vscode 설정, MacOS 환경
rpi-pico vscode 설정, MacOS 환경
MacOS 환경이라고 해서 rpi-pico vscode 설정이 크게 달라질거라고는 생각하지 않지만 뭐.. 혹시 모르니깐 ㅎㅎ 일단 getting started 문서 chapter 7 기준으로 할거야 참고해. 설마 vscode 안깔려 있는 사람 없
engschool.tistory.com
저번에 vscode에서 빌드를 할 수 있도록 찝찝하긴 하지만 해놨어..... 음.. 너무 고민하지 말고 다음으로 넘어가자고!
다음은 디버거 세팅이야. swd나 jtag(보통 swd 지원하니깐) 디버거 툴 가지고 있으면 그걸로 하면 될거야. 하지만 난 없어서 고민하고 있었는데 picoprobe라는 게 있더라고 별건 아니고 pico보드 자체를 swd 툴 + uart converter로 만들어 사용하는거야.

pico probe를 사용하지 않는다면 아주 수월하게 할 수 있는데... 그놈에 pico probe가 뭔지.. 만 하루를 삽질했어. 에휴.. 그래도 나처럼 성질 지랄맞은 사람은 시도해보도록 해. 하는 방법은 👇 아래와 같아. 간단해 보이지만.. 드러워~
- pico 보드를 준비한다.
- picoprobe.uf2 를 다운받아 준비한 pico보드에 넣는다.
- picoprobe 보드와 타겟 보드를 연결한다.
- picoprobe용 openocd를 다운받아서 빌드한다.
- vscode에 적절한 옵션을 넣는다.
- vscode로 디버그 한다.
난 선물로 받은 pico 보드가 두개 있어서 그 중 하나는 picoprobe 보드로 사용할거야. picoprobe.uf2 는 아래 링크에서 다운받을 수 있어.👇👇 다운 받은 파일을 pico 보드에 다운로드 하자.
picoprobe.uf2 download: https://datasheets.raspberrypi.com/soft/picoprobe.uf2
그리고 나서 getting-started 문서의 appendix A를 참고해서 두 보드를 연결했어.
아래와 같이 말이지, 👇😆😆 좀 엉망이긴한데 이해해달라고 ㅎㅎ 사무실 오픈한지 얼마 안되서 자재가 없었어!!
자 그리고 다음은 openocd를 설치할 차례야.. 내가 mac studio를 사용하고 있어서 그런지 모르겠는데 여기에서 만 하루가 넘게 걸렸어. 설치하는 건 getting started랑 크게 다르지 않은데 몇몇 명령어가 틀리고 라이브러리도 따로 다운받아야 해.
먼저 디펜던시 설치
% brew install libtool automake libusb wget pkg-config gcc texinfo그 다음 picoprobe가 포함된 openocd 설치 (나는 ~/pico 위치에 설치했어.)
% git clone https://github.com/raspberrypi/openocd.git --branch rp2040 --depth=1
% cd openocd
texinfo라는 라이브러리 경로 환경변수에 추가
옛날 맥
export PATH="/usr/local/opt/texinfo/bin:$PATH"M1 이상
export PATH="/opt/homebrew/opt/texinfo/bin:$PATH"bootstrap 수행 - 나도 뭔지 모름. 뭔가 빌드하기 전에 복사도 좀 하고 그런거겠지...하고 있어.
./bootstrapconfigure로 환경 설정 - 원래는 심플하게 configure --enable-picoprobe --disable-werror 였는데 capstone library 위치가 M1 이전으로 설정이 되어 있어서 아래와 같이 M1에서 위치로 설정해줬어.
CAPSTONE_CFLAGS="-I/opt/homebrew/Cellar/capstone/4.0.2/include/capstone -I/opt/homebrew/include" ./configure \
  --enable-picoprobe --disable-werror
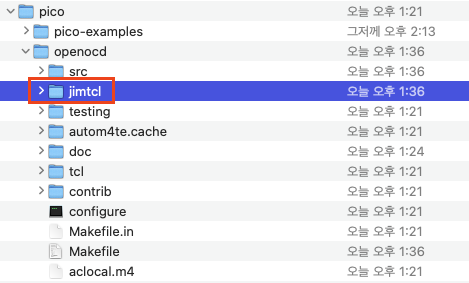
이렇게 하고 make를 하면 되는 것처럼 나와 있는데 시도해보면 jimtcl 라이브러리 쪽에서 arm64로 빌드하는데 x86_64로 링크해서 파일이 무시된다는 경고가 뜨면서 에러. 중지... 무슨 짓을 해도 안되더라고. 결국 openocd에 포함된 jimtcl 라이브러리에 문제가 있다고 판단해서 jimtcl 라이브러리만 따로 다운받아 기존 폴더와 교체했어.
Jimtcl official github link 👇
https://github.com/msteveb/jimtcl
GitHub - msteveb/jimtcl: Official repository of Jim Tcl, an open-source, small footprint implementation of Tcl
Official repository of Jim Tcl, an open-source, small footprint implementation of Tcl - GitHub - msteveb/jimtcl: Official repository of Jim Tcl, an open-source, small footprint implementation of Tcl
github.com
github에서 다운로드 받은 jimtcl 폴더를 기존 ~/pico/openocd/jimtcl 폴더와 교체.
그리고 나서 make 명령어를 이용하면 정상적으로 빌드가 되는 것을 확인할 수 있어.
이제 vscode 설정을 해야해. 먼저 pico-examples 폴더 안에 .vscode 폴더를 만들고 launch.json 파일을 생성해. 그리고 아래와 같이 입력. ※주의: configFiles 폴더에 자신의 경로를 넣을 것!!
{
  "version": "0.2.0",
  "configurations": [
    {
      "name": "Pico Debug",
      "cwd": "${workspaceRoot}",
      "executable": "${command:cmake.launchTargetPath}",
      "request": "launch",
      "type": "cortex-debug",
      "servertype": "openocd",
      "showDevDebugOutput": true,
      // This may need to be arm-none-eabi-gdb depending on your system
      "gdbPath": "arm-none-eabi-gdb",
      "armToolchainPath": "/Applications/ARM/bin",
      "device": "RP2040",
      "configFiles": [
        "/Users/peterbang/pico/openocd/tcl/interface/picoprobe.cfg",
        "/Users/peterbang/pico/openocd/tcl/target/rp2040.cfg"
      ],
      "svdFile": "${env:PICO_SDK_PATH}/src/rp2040/hardware_regs/rp2040.svd",
      "runToMain": true,
      // Work around for stopping at main on restart
      "postRestartCommands": ["break main", "continue"]
    }
  ]
}
Getting started의 내용과 약간 틀린데 우선 gdbpath는 arm-none-eabi-gdb로 변경, armToolchainPath 추가, configFiles 경로 변경 및 raspberrypi-swd.cfg를 picoprobe.cfg로 변경 해줘야해. getting started의 설정은 raspberry-4 것 같아.
그리고 마지막으로 setting.json 파일을 .vscode 폴더에 생성한다음 다음을 입력.
{
"cmake.environment": {
"PICO_SDK_PATH": "/Users/peterbang/pico/pico-sdk",
"PICO_TOOLCHAIN_PATH": "/Applications/ARM/bin"
},
"cmake.statusbar.advanced": {
"debug": {
"visibility": "hidden"
},
"launch": {
"visibility": "hidden"
},
"build": {
"visibility": "hidden"
},
"buildTarget": {
"visibility": "hidden"
}
},
"cmake.buildBeforeRun": true,
"C_Cpp.default.configurationProvider": "ms-vscode.cmake-tools"
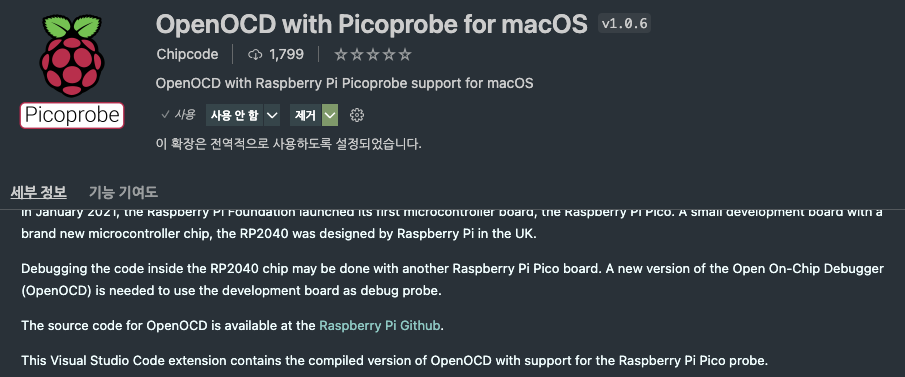
}그리고 rpi-pico용도의 openocd vscode extension이 존재하긴 하는데.... 안되더라고.. 분명히 compiled version이라고 되어 있는데... 내가 사용을 잘 못해서 그런가???? 안돼.
사실 picoprobe를 안쓸거면 위 과정이 전혀 필요가 없이 homebrew로 open-ocd를 설치하면 간단하게 끝날 것 같아. 기본 open-ocd에서는 ftdi, ulink, st-link처럼 유명한 툴들을 전부 지원하니까 말이야. (picoprobe는 open-ocd에 포함되어 있지 않아서 이지랄.. ㅠㅠ)
brew install open-ocd
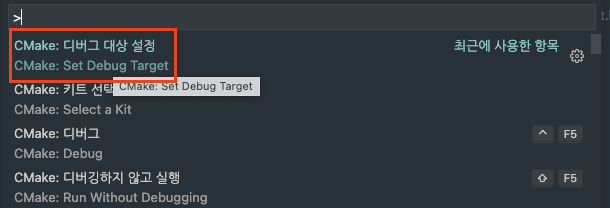
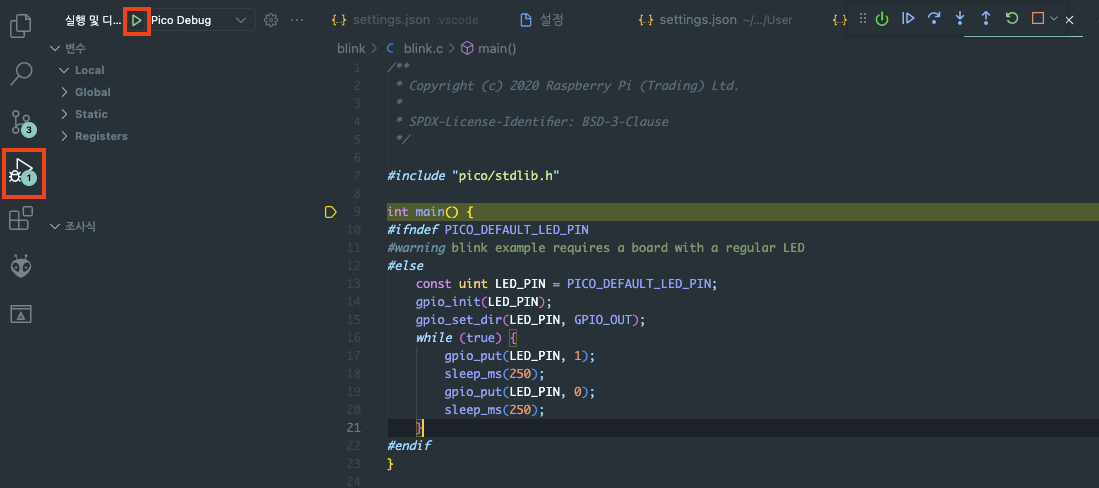
이제 테스트를 해보자구. (shift + cmd + P) => Set Debug Target를 선택한 다음.
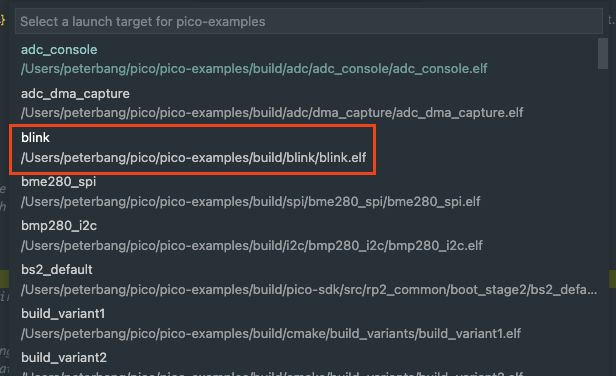
디버깅할 프로젝트 선택. 우선 blink를 선택해보자구.
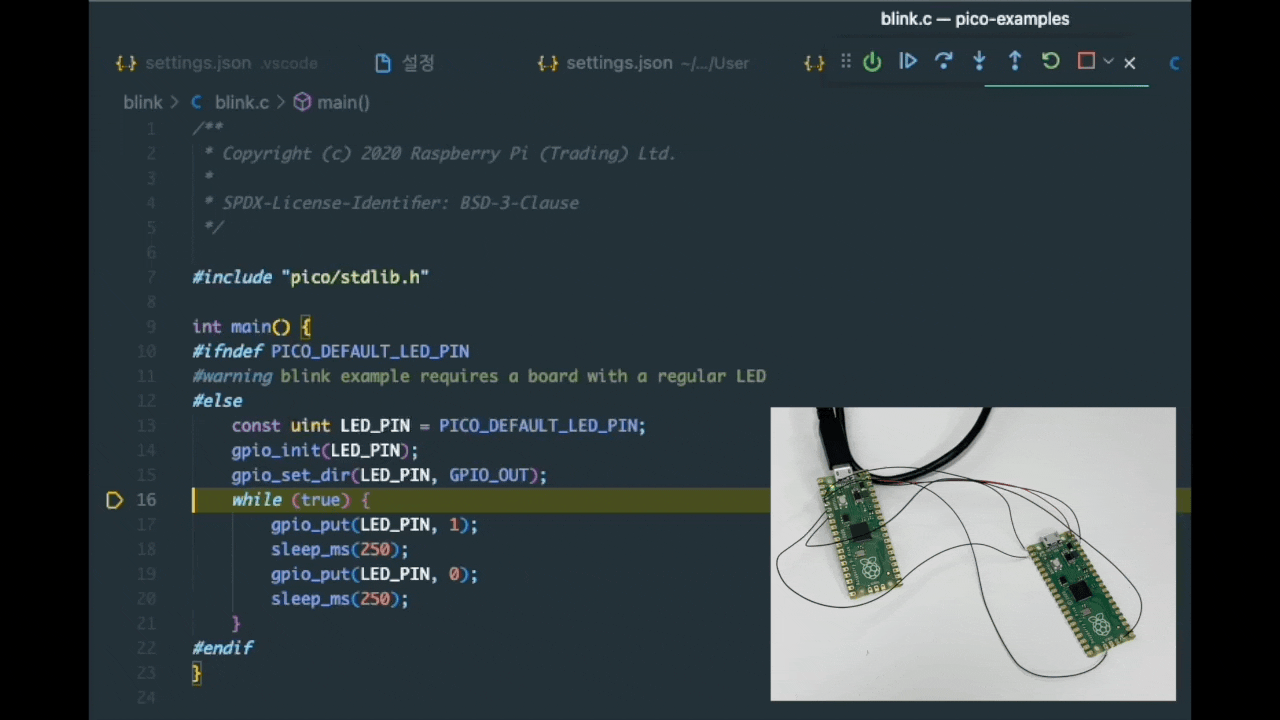
그리고 나서 왼쪽 디버그 탭 선택 -> 상단 녹색 플레이 버튼 누르면 디버그가 시작돼.
그리고 실행이 잘되는지 이것 저것 눌러보자. 나는 한 스텝씩 지나가면서 LED on/off되는 거 확인해봤어. 추가로 hello_uart를 통해서 uart -> USB_CDC가 잘 동작하는 것도 확인했고. 잘 되더라고.
led, uart, printf 다 했으니까 이제 이리저리 쓸일이 많은 spi를 해보자고! 안녕!
'임베디드 하드웨어 > Raspberry PI Pico' 카테고리의 다른 글
| rpi-pico new project 만들기 (0) | 2022.08.09 |
|---|---|
| rpi-pico vscode 설정(MacOS) (0) | 2022.08.06 |
| rpi-pico Hello world!(MacOS) (2) | 2022.08.06 |
| Raspberry Pi Pico 시작하기(MacOS) (0) | 2022.08.05 |